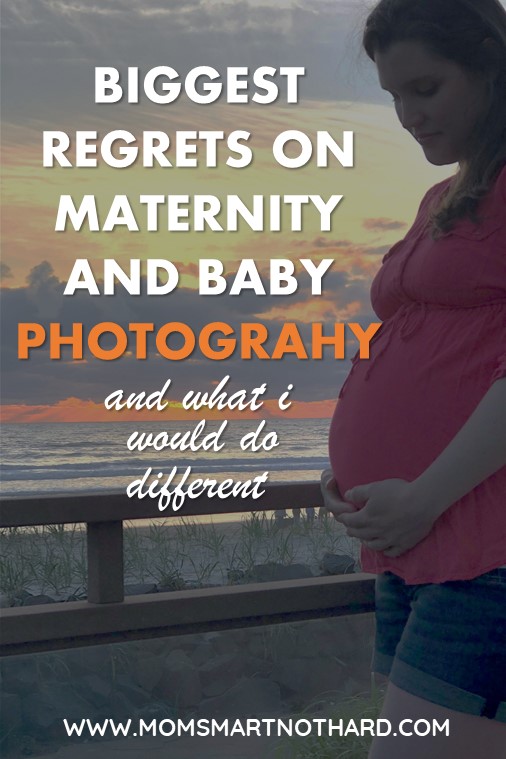
Your Guide to Maternity, Hospital and Newborn Photography
Published 2025-12-18 · Last reviewed July 2026
This is information, not medical advice
Always follow guidance from your own midwife, GP or paediatrician.
Photography surrounding the addition of your newest member of your family might not be your top priority. However, it needs to be a top priority.
Learn from me. You want to prioritize photography because you will want those precious photos and because if you don’t spend time on it, you end up paying a lot to not get what you want.
Whether you want maternity, hospital and/or newborn photos, here is everything I learned and wish I did when my first was born and what I am doing the second time around.
Disclaimer: this post contains Affiliate Links. Read about what affiliate links are and how we use them here.
Why photography must be on your nesting to-do list
Photography is something you don’t want to wait on. Add it to your nesting to-do list so it is booked before baby’s arrival. The last thing you want to have to do while caring for a newborn is try to look up and call photographers to find out their prices and package details.
Especially since newborn photos are time sensitive. If you want those adorable curled up photos you see everywhere, they MUST be done in the first two weeks. You can find nesting checklists by trimester and week in our Nesting Planner.
Learn from me
Lesson 1: I didn’t research photography while pregnant
When L was born, I didn’t even think about the idea of getting photos until we got home from the hospital. Being so sleep deprived and busy breastfeeding and caring for L, we booked the first photographer we found online. While expensive, we thought it was worth it to get quality photos of our baby. However, we didn’t realize that the price only covered the photo shoot and we didn’t get the digital rights to the photos.
Lesson 2: We didn’t verify the details of the package
We didn’t realize that our package didn’t include the digital rights to all the photos. Once the photoshoot was complete, we got to view all of these wonderful photos I would have loved to have used in photobooks and shared with family. To buy the digital rights after the fact would have been $100 a photo, which is outrageous.
Lesson 3: I didn’t know what my goals were
I could have bought products such as the photos printed or on a canvas, but I didn’t want to hang every photo. Once, I saw the photos, I wanted to use them to make a baby book like the ones they have at Artifact Rising, MILK or Shutterfly. I wanted them on my computer to use throughout the years.
The photos were beautiful memories to me that I would have loved to have keep. I didn’t need every photo to be touched up or perfect. If you have a good photographer, the photos without editing are well worth keeping and so much better than your typical iPhone photos.
At the end of the day, I realized my top goal was getting digital rights. Now, knowing this and feeling it is the best way to spend my money, I will only book photographers who give you digital rights.
I also planned on doing announcements but again wanted to do this on my own and not through my photographer. You can only do this if you own the photos.
Lesson 4: I didn’t realize how much I valued candid photos
When we got our photos, they were all posed. I love the posed newborn photos, but I really wished we got candid ones too. You just added a family member, it is such a beautiful moment. It is the first time you are a family of three, four, five etc.
Capturing that along with the emotions truly gives you such a wonderful keepsake. Our photographer only did posed photos. None of the emotions are there. She never took any of us just interacting with baby or breastfeeding baby.
This time around, I am prioritizing finding a photographer who does both the posed and candid photos.
Lesson 5: The power of bundling
A lot of photographers have bundle options or offer photo packages. These can be maternity, hospital or newborn. By booking more than one type of photography or bundling packages, you might be able to negotiate the price or the details. If you book all three, try getting the digital rights to all photos or switch out products depending on what you want.
What to consider with photography
When you start the process of finding a photographer, you need a way to judge how well of a fit they would be for your family. The best way besides looking at their portfolios of photos on their blog or Facebook is to get the details of the packages they offer.
The details of the packages should tell you the following:
- Type of photo session
- Price of the photo session
- Length of the photo session
- Number of photos (digital rights) included
- Post processing and editing
- Number and size of printed photos included
- Products such as canvases, announcements
- Can you bundle multiple photo sessions?
- Cancelation policy
- Booking Fee
Be careful and find out if there is a booking fee. You will want to verify if the booking fee is in addition to the package or included in that price. Also if something isn’t shown always ask. Never assume or you might end up in a situation where you paid a lot for a photo session and that didn’t include the rights to any of the photos.
Different types of photography sessions
There are three main types of photography which include maternity, hospital and newborn.
Maternity Photography
The maternity session is usually done during the third trimester. This includes photos of you and your gorgeous baby bump along with some family shots. It is a fantastic way to capture the joy of expecting.
Be sure to invest in a good maternity dress for this photoshoot. Some photographers also have wardrobes you can have access to.
To make sure you get what you want, beforehand search and browse maternity photos. That way you have an idea of what outfit you want and the type of poses you like. Be sure to save the photos you really like and send them to your photographer so they know what you are looking for.
Hospital Photography
There are two types of photo sessions that fall under this category. Birth session and a fresh 48 hours session. A birth session means that the photographer comes to the hospital to capture the baby being born. They usually arrive to capture part of labor, the delivery and the aftermath. You get photos of holding baby for the first time, the first weight and your first moments of being a new family. These photos are candid and full of emotion.
The second type, fresh 48 hours, is where the photographer comes to the hospital during your recovery stay. You get to take posed and candid photos. These might include just baby, baby with parents, and baby with siblings. In addition to getting family photos, you might also get some more candid photos here of nursing and holding baby.
In either of these types, make sure you invest in a hospital gown that will look great in photos. You can also consider a nursing lounge set. You don’t want to look over dressed or fancy but you do want to have something that fits well. Remember to pack your photo outfits in yours, dad’s and baby’s hospital bags along with makeup and other essentials you think you might need for this type of session.
Just like the maternity session, make sure you browse through lots of photos beforehand to send your photographer ideas on what you want and to help you decide on outfits and other items you don’t want to forget.
Newborn Photography
This session is done in the first two weeks of life. As baby gets older, your ability to get newborn photos disappears because they don’t curl up anymore. These photos typically include posed photos of family in all different arrangements in addition to the photos of baby curled up in different cute settings. When looking at photographers, you can see what type of props they have to take these types of photos by viewing their past sessions on their Facebook page or blog.
Make sure to look through photos so you can send your photographer different ideas especially if you are looking for something specific.
Also some newborn photographers will come to your house to do this session. So if you want home photos, be sure to look for this in the package details. If you wanted pictures of baby in the nursery, this is an excellent way of getting them.
While I got the advice to nurse before the photographer showed up, I wished I hadn’t. I wish I nursed baby at the beginning of our photoshoot instead. I would have loved getting candid photos of nursing L and then some of her sleeping on me. After nursing, baby would have been asleep, which would have been a perfect time to get those curled up photos.
Because I nursed L before the photographer showed up, she spent 15 minutes setting up, while L slept. We weren’t able to get all of the photos because she woke up and was upset. While I wanted some photos of her awake, it put a faster timer on the photoshoot.
The process of finding the perfect photographer
Finding a photographer can be challenging. You want to find someone who offers what you want in the correct area and at the correct price. Start by making a list of your options. Staying organized is key to finding your perfect photographer.
Do google searches typing in maternity photographer, birth photographer and newborn photographer. Add in your location with each of these searches. You might also want to do the searches again but change the location to surrounding areas or towns depending on where you live.
Next, utilize Facebook search to try to find photographers in your area. Some photographers only advertise on Facebook and won’t show up on google. If you are in any large Facebook groups, send out a message to get some recommendations on photographers in the area.
Now that you have your options, go on their various sites and try to find details on the packages they offer. Browse their photos to make sure that their style and quality matches what you are looking for.
A lot of photographers require you to email to get the details on their packages. Draft an email with all of your questions to ensure you have all of the information in the above section, What to Consider. Remember the important question on digital rights.
Once you get all of the information and you are looking at a few photographers. Try to negotiate to get exactly what you want. Now that photography is booked, you want to invest in outfits to make sure you love how you look in those photos.
Why investing in a nice camera might be a smarter option
Just that one photography session is going to be as expensive as investing in a nice camera. With the internet, it is so easy to learn how to take professional like photos. The biggest advantage to deciding on buying that nice camera instead of going with a photographer is that you only make the investment once. The camera can be used again and again throughout the years to take fantastic photos. If you go the photographer route, you will always have to pay a high price to get great photos. Without the camera, I could never get high quality candid photos of all those fun moments at home throughout the years.
How do you exactly accomplish this?
1. Determine what camera you need
After doing a lot of research, I felt the best camera that would be easy to work with and take fantastic photos was the. Canon is a very popular camera so it was easy for me to find free tutorials on how to use the camera for a variety of different types of photography. I got the generic lens, which will allow me to really take any photo I would want and a. The 50 mm lens is the workhorse of most portrait photographers. It will make the people in your photos sharp. It is seriously the best way to get fantastic photos of your kids throughout the years.
2. Utilize Pinterest
Pinterest is your best friend here. Not only can you find fantastic advice on how to take professional photos easily by searching DIY Photography but also find tutorials on how to take newborn photos by searching DIY Newborn photography. Make a board and start pinning!
Here is my DIY newborn photo of L and I love it more than the photos we got from our photographer.
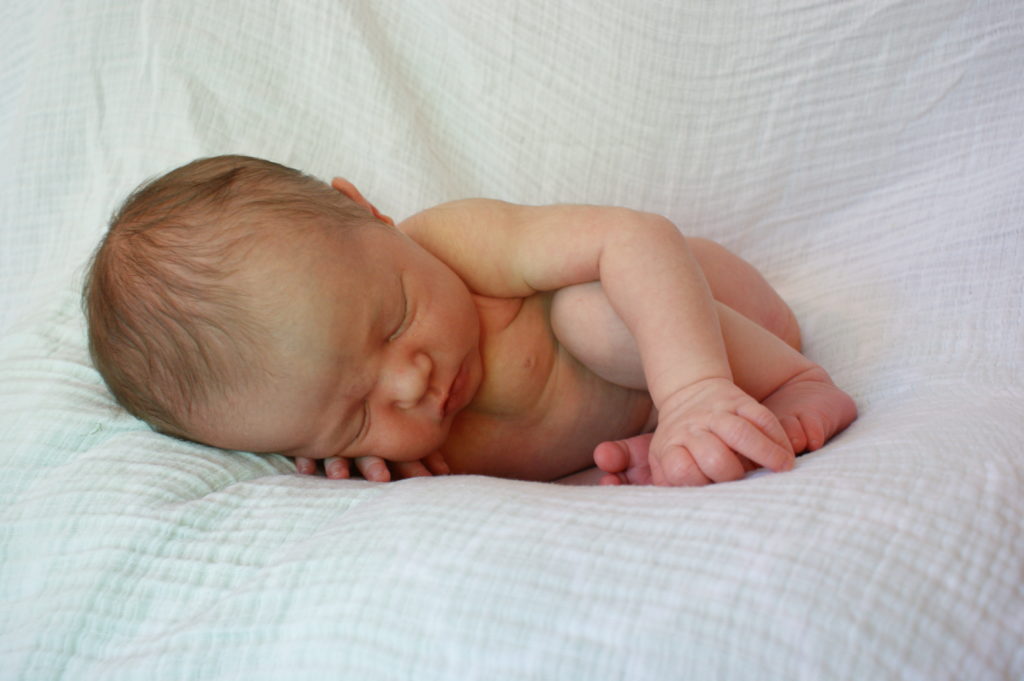
3. Buy photo session supplies before baby is born
While searching on Pinterest for DIY Newborn Photography, a lot of the tutorials have lists of items to use to get those awesome photos. You will probably have most of the items. For example in my DIY photo of L above, all we used was a with a blanket over it. Consider buying a few baskets and blankets to try out. Purchase anything you might want to use including outfits or accessories before baby is born.
You can also then take high resolution photos each month of baby. Now you have gotten newborn and milestone photos out of your investment into your camera. Not to mention the thousands of candid photos you will take of baby over that first year.
4. Determine a system for storing your photos
You are going to have a lot of photos even if you decide not to invest in a nice camera. Babies change so fast and so much over that first year. You will want to try to capture everything. Your hard drive will soon be full and you won’t be able to find pictures because there will be so many.
First, I organize my photos first a year folder, then by a month folder. I always include the initial of each kid and the age in the month title for example: L 2 months May. We pay for a yearly Dropbox subscription so our files and photos are always backed up and we have the extra storage space.
5. Use your photos
You can use all of your photos because you don’t have to worry about copyright. You can make photo books, announcements, share them with family, print them, canvas them. You will have so much fun over the years being able to utilize these photos.
Prioritize Photography
Having a baby is a wonderful moment in your life. It is the beginning of your child’s life. You will want beautiful photos.
First, determine how you want to capture the birth of your baby by deciding on the type of photos: maternity, hospital and/or newborn.
Pay attention to package details and digital rights when picking and booking your photographer.
Want to get more bang for your bucks? Consider investing in a instead of a photographer. That way for the same amount, you get to take high quality photos of all the moments throughout your child’s life instead of just one day.
Search Pinterest for DIY newborn photography and DIY photography to find free tutorials which will have you taking fantastic photos in just days.
Want more ways to nest? Take our Nest Smart Course so you are ready for baby’s arrival. We want you to be prepared, de-stressed, confident and most of all excited for your new bundle of joy.
If you found this post helpful, please share it on Facebook or Pinterest